Cracking the 0DTE Code, Part 3: The Call-Premium Divergence Method
1) What we’re exploiting (quick recap)
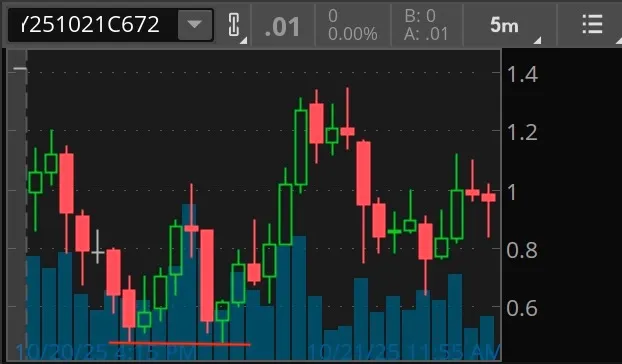
Observation: On 0DTE, call premium sometimes diverges from SPY at turning points.
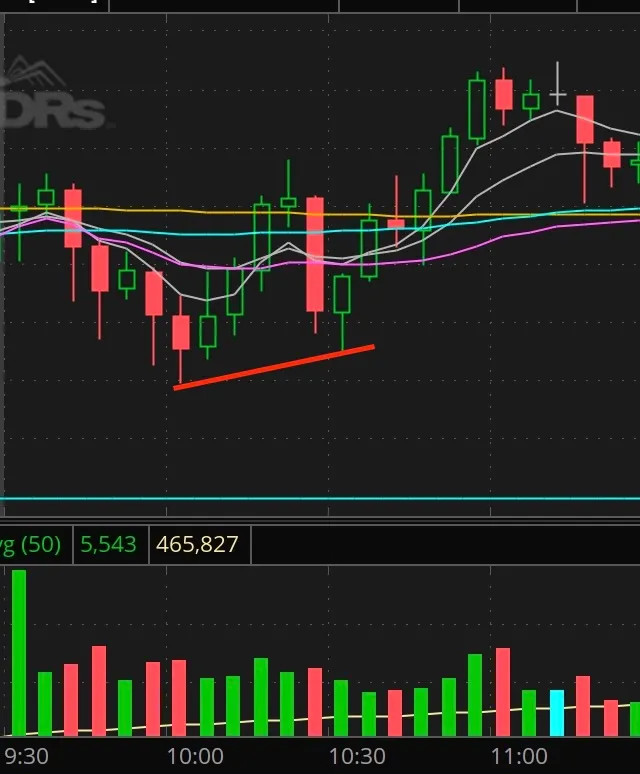
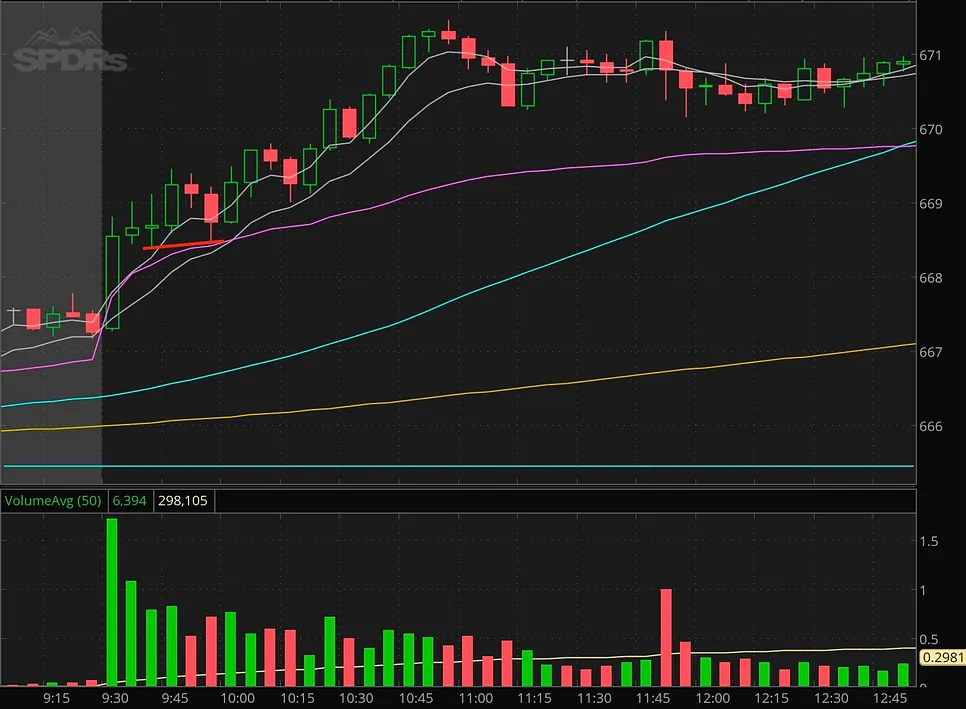
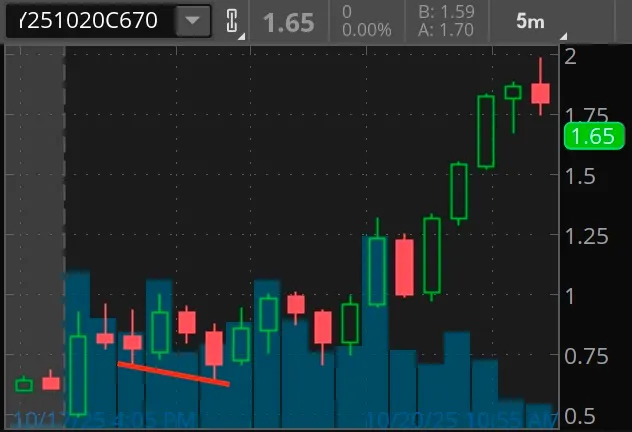
- Bullish Divergence (buy calls / long): Call premium prints a Lower Low (LL) while SPY prints a Higher Low (HL).
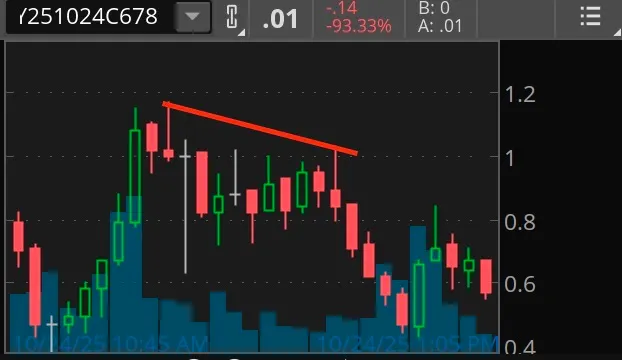
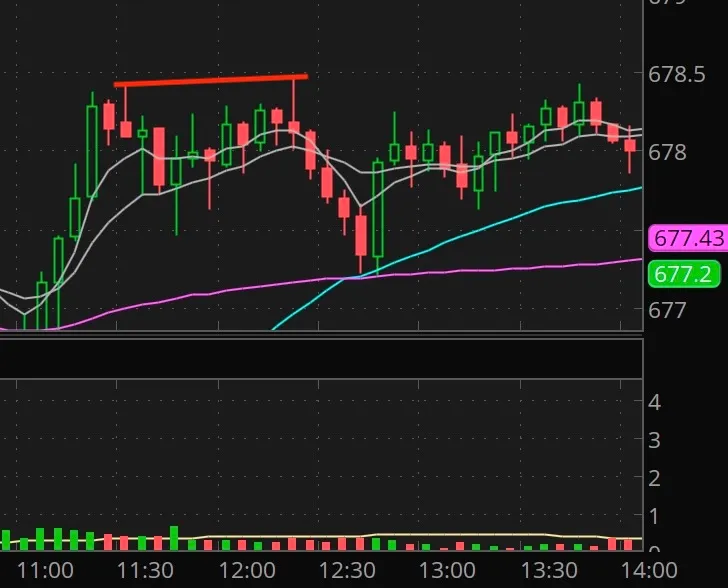
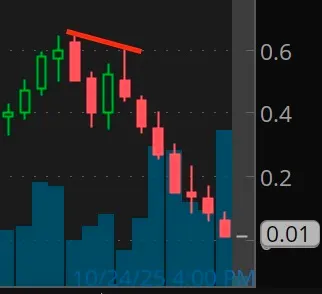
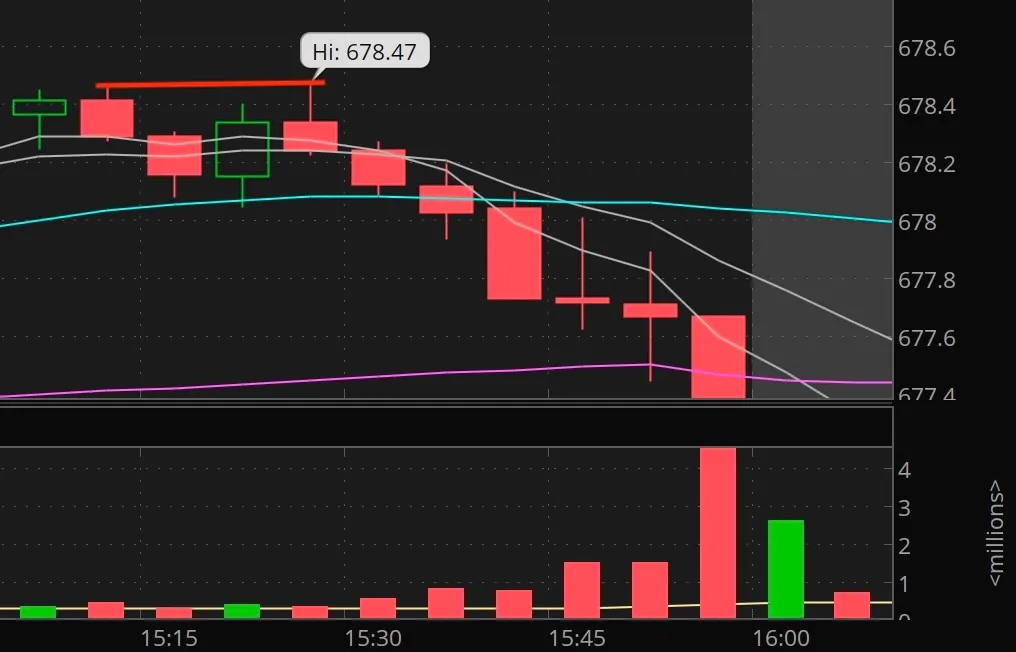
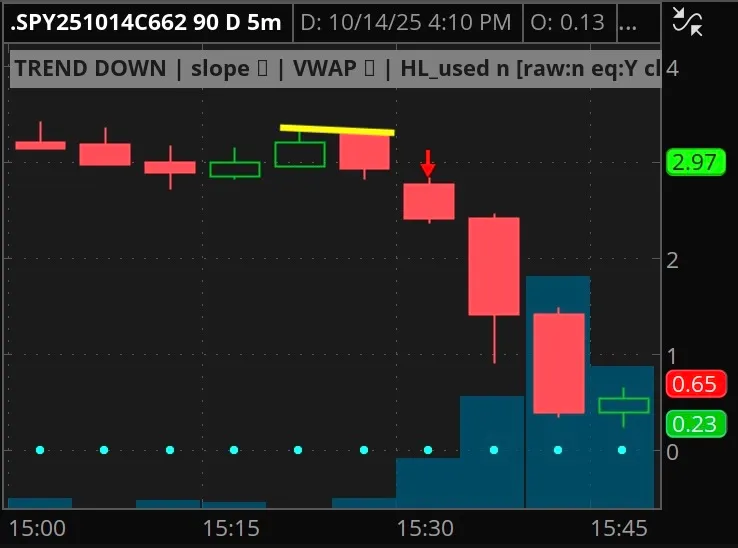
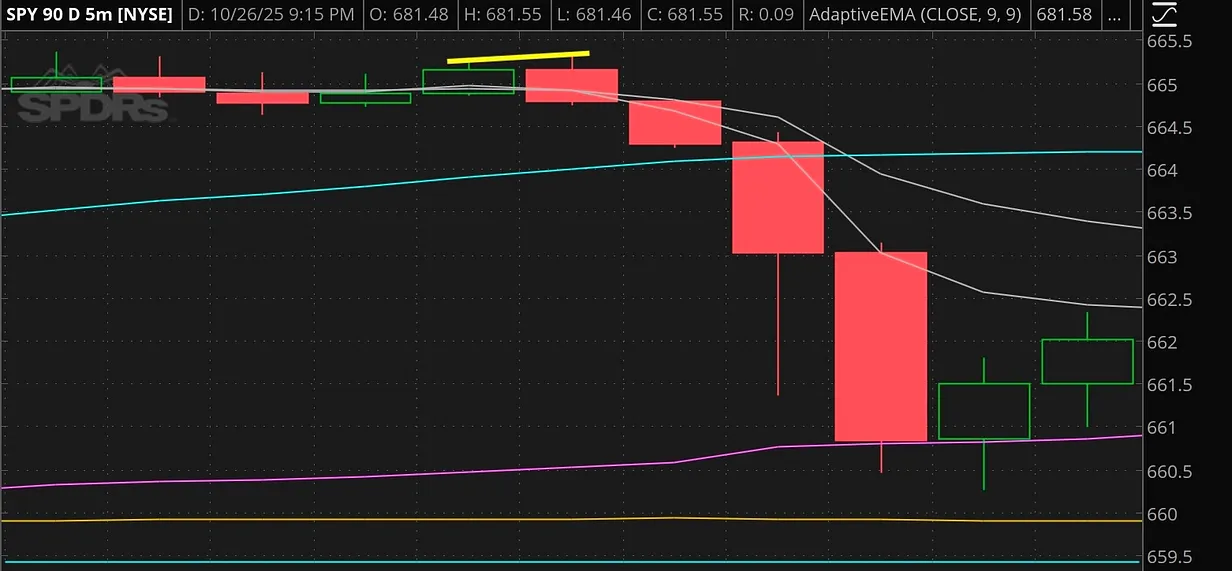
- Bearish Divergence (short bias / buy puts / short): Call premium prints a Lower High (LH) while SPY prints a Higher High (HH).
Why it happens
- Into dips, call IV is crushed and dealers lean short-gamma; calls get “underpriced” vs the underlying. When SPY forms a HL, call premium is still lagging → cheap convexity.
- Near tops, upside IV can be capped (supply/hedging dynamics), so even with a SPY HH, calls sometimes fail to make a HH (they make LH) → loss of upside momentum/convexity.
You’re trading price + vol microstructure, not just price.
ATM strikes show dealer hedging behavior most clearly, while slightly OTM strikes are where you express the trade for higher % return.
2) Instruments, charting, and baseline settings
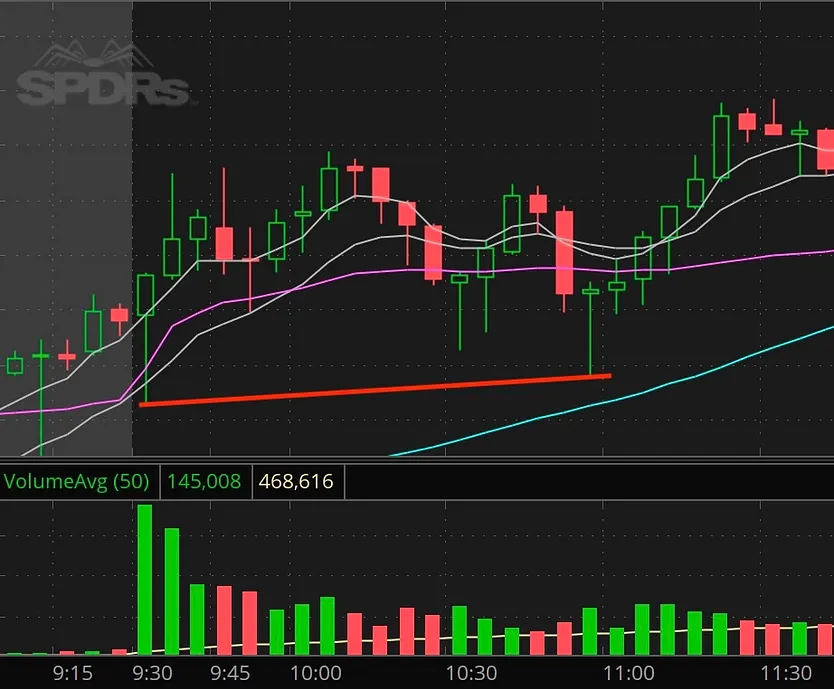
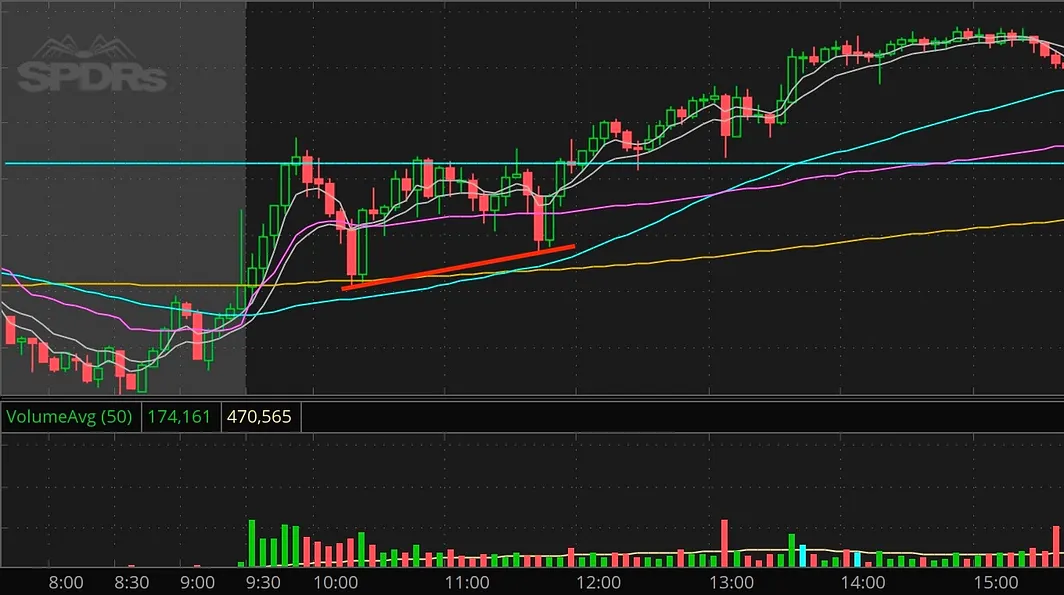
- Underlying: SPY (5-minute chart).
- Option to watch: The ATM same-day call for divergence detection. Once a clean signal forms, you can enter using a slightly OTM call (~15–35 delta) if you want more convexity. If SPY rips through, roll to the next slight-OTM strike.
- Timeframe: 5-minute for both price and premium (same RTH session).
- Session focus: 9:35–11:15 ET and 13:30–15:50 ET. Fade/ignore lunch unless it’s a trend day.
- Visibility: Put SPY in the center, the call premium on the left. Mark simple swing highs/lows. Look for pivot pairs within ~3–8 bars.
3) Entry rules (mechanical)
A) Bullish Divergence (Long bias / Buy Calls)
- Identify latest two lows on SPY and on the ATM call premium.
- SPY: newest low > prior low → Higher Low (HL).
- Call: newest low < prior low (or equal within a tick) → Lower Low (LL).
- The two low pivots occur within your pairing window (neither must lead).
- Trigger: Enter on the next bar only if the candle closes above the SPY-HL bar’s high (confirmation). You can execute using the ATM call or a slightly OTM call for more convexity.
B) Bearish Divergence (Short bias / Buy Puts / Short)
- Identify latest two highs on SPY and on the ATM call premium.
- SPY: newest high > prior high → Higher High (HH).
- Call: newest high < prior high (or equal within a tick) → Lower High (LH).
- The two high pivots occur within your pairing window.
- Trigger: Enter on the next bar only if the candle closes below the SPY-HH bar’s low (failure/roll). Express the short bias via puts or shorting SPY directly.
4) Risk, exits, and management
- Initial stop: Longs — below the call LL or the SPY HL (tighter). Shorts — above the call LH or the SPY HH (tighter).
- Time stop: If the move hasn’t started within 4–6 bars, reduce or exit; decay is real.
- Profit taking: Scale at +30–50% on premium; trail under/over the latest 5-min swing.
- No averaging down: 0DTE convexity only helps when your timing is right.
5) Trade outline (Pin This)

Bullish divergences


Bearish divergences
6) Where this shines
- Open reversals: Early SPY HL against still-crushed ATM call premium.
- Trend exhaustion: SPY forces a marginal HH while ATM call premium prints LH → short.
- Gamma pivot days: Dealers switching gamma profile intraday amplifies the IV snap-back.
Final word
For bullish divergences, you’re buying calls at their cheapest point, mispriced vs the underlying. IV is still compressed, the market is fearful, and premium hasn’t reflected the rebound. As price and IV recover, convexity works for you.
For bearish divergences, SPY pushes to a marginal new high but call premiums fail to confirm (LH) as IV fades. Upside momentum weakens and dealers stop bidding up calls; once price rolls, IV expands and call premiums collapse. The short bias pays.
In short:
- Use ATM calls to measure the divergence (they show dealer hedging most clearly).
- Use slightly OTM calls (≈15–35 delta) to express the long trade for better % returns.
- Puts still reward confirmation (joining the move & fading IV) on the bearish side.